
This year I'm celebrating Christmas with Dan's family. My brother is coming to join the party too and at last count I think there is about 24 of us in total, phew!
In order to make-sure we all share a bit of the Hosting-Christmas-Day load, we're all contributing in one way or another. I'm making the Christmas Cake, along with a few other bits and pieces. And Dan? Well apparently he's "in charge of Lego". Brilliant.
I know Christmas Cake is absolutely not everyone's idea of a good time, it's a bit like Marmite, love it or hate it. I happen to completely LOVE it (but hate Marmite if anyone's taking note).
Now, I've made Christmas Cake once before. I think I was fairly young, and the only thing I can really remember about the experience was that I definitely used the Classic Delia Recipe (the wholly grail of all Christmas Cake Recipe's apparently), and that icing a Christmas Cake is not as easy as one might think.
Here's hoping this one fairs a little better!
Making a Christmas Cake isn't hard per-se. It just requires quite a bit of prep work and time! Definitely a job for the weekend.
I made my cake a couple of weeks ago but apparently there's a traditional time to make your Christmas Cakes and Puddings called "Stir-Up Sunday". This is the last Sunday before Advent, so this year it's this weekend - Sunday 24th November. The whole family get's together to prepare the Cake/Pudding and each takes a turn at stirring the mixture whilst making their Christmas Wish. Love that.
I jumped the gun because I got a little worried that:
a) I had no free weekends from early Nov to Christmas and would run out of time, and
b) That just three weeks of "feeding' the cake brandy wouldn't a boozy cake make.
If you're not an alcoholic like me (kidding Dad), then anytime before Christmas is just fine to make your cake. And also my version is completely not child friendly! In my experience most kids are Christmas Cake Haters, and that's what a Christmas Yule Log is for, right?
Ok, so on to the how-to. Have you got a cuppa handy? This is a long one.
The night BEFORE you want to bake, you need to soak your dried fruit in 3 tablespoons of brandy (or your festive liquor of choice). For some reason I forgot to photograph this but it's pretty straight-forward.
Then the next morning you start by lining your 8" cake tin. You need to make sure you have a deep tin. A sandwich tin will absolutely not work here. I got mine from Sainsbury's for about £5 (they had an offer on). Actually, I got all of the ingredients/materials for this cake from Sainsbury's. So if you have a larger store near you, you can pick up everything in one shop.
Delia says to double-line, but I'm a rebel so just did one (spoiler alert - it turned out fine).
I started by drawing around the base of the tin on parchment/greaseproof paper, and then guestimating a long strip to go around the perimeter.


Once you have your side-piece the right length, fold over the bottom 1/2 inch and make little cuts in it to enable it to sit flat against the sides of your tin.

I then greased both pieces with some butter and stuck them into the tin. Side piece first, then base.

Now you have to line the outside of your tin. This is so the cake bakes slowly and evenly. You need to wrap some brown paper around the outside and then tie with string.
It will look a bit weird but something like this is fine.


And now, after all that. If you can be bothered it's time to bake!
Preheat your oven to 110-120 (degrees). Delia says 140 for her conventional oven, mine's a fan oven so you need to reduce the temp by about 20 degrees. I was scared so was probably closer to 110 than 120 (it's hard to tell exactly).
Next you cream your butter and sugar together. I went for a mix of dark brown and light brown sugar.


In a separate bowl, whisk together your eggs and add to the mix a little at a time.

And then sift in your flour, nutmeg and mixed spice.

At this point you stop with the mixing and fold-in the flour (you're trying to keep as much air from the sifting process as possible).

Then you're ready to add your soaked fruits, chopped almonds, orange and lemon zest (and make your Christmas Wishes!).


When it's all combined it's ready to go in your tin.

Spoon it in and level the surface.

Your cake needs a little hat! Take a double sheet of parchment paper wide enough to cover the surface of your tin and cut a hole in the middle. This "hat" will flap around a bit in a fan oven but shouldn't actually fall off.

And then you bake, for a looooong time! Delia says 4 1/2 - 4 3/4 hours, but maybe longer. It's difficult to tell because everyone's oven is different.
I left mine alone for 3 hours and then had a look. It was cooking really slowly so I decided to take it's hat off and look at 4 hours.
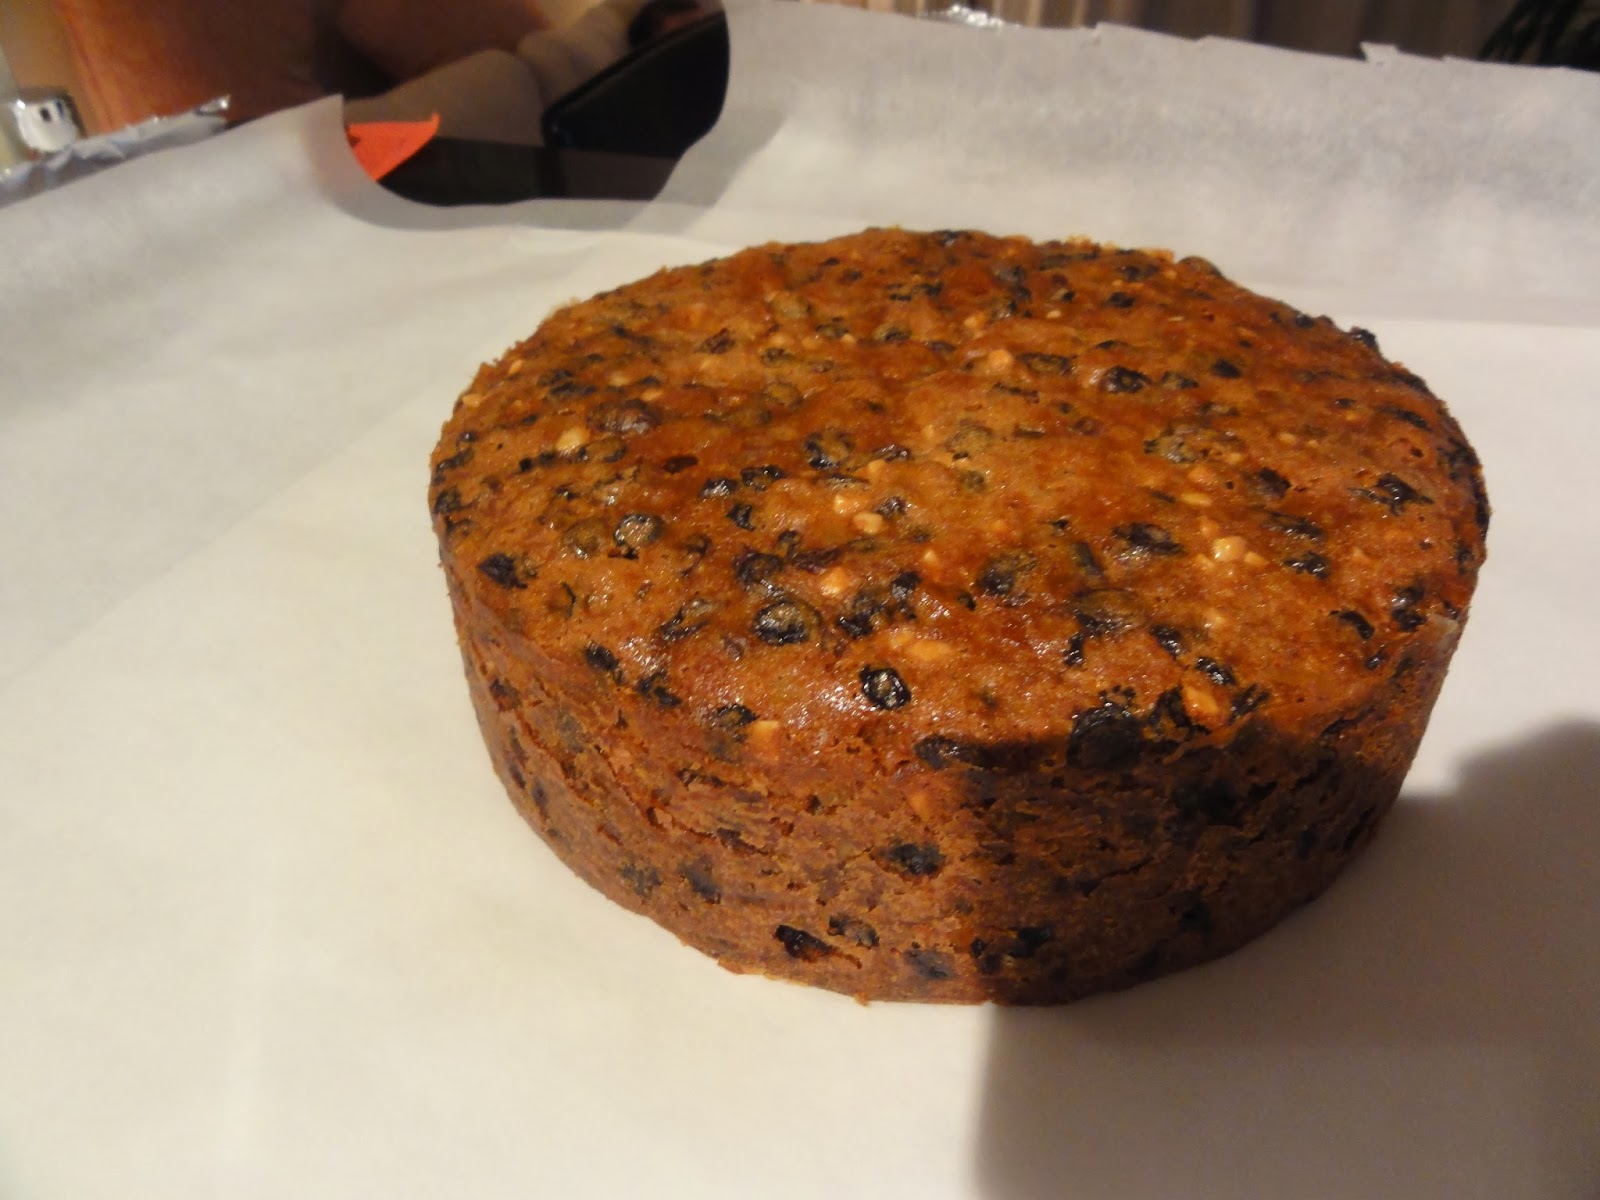
At 4 hours in it was looking pretty done but I wanted to try and leave it until the minimum time (4 1/2 hours). At 4 hours, 20 minutes I was scared it would dry out so did the "bounce back" test Delia describes and inserted a clean skewer into the centre of the cake. It came out clean so I decided it was done! It looked like this and smelt amazing. The whole flat smelled like Christmas for a good 6 hours. That's worth your time and energy alone.

I left it in it's tin to cool for a while and then removed the tin to let it cool on a wire rack.
At this point I did the first brandy feed. I made small holes in the top with a skewer and carefully spooned over some brandy (just a few teaspoons). I will be repeating this process every four days until I ice the cake a few days before Christmas.
Finally, when the cake is completely cool it's time to put your Christmas Cake baby to bed.
I laid out two sheets of foil in a cross and then did the same with parchment paper.

I popped my cake in the middle and wrapped it up well. And then put it into an air-tight container.

I gave mine a little wish to be yummy and tasty for us all on Christmas Day and then put it somewhere cool and dry.
And that dear friends is my tale of Christmas Baking. And you know what? It totally got me in the festive spirit. Even Daniel, the Christmas-Cake-Hater, couldn't help but feel Christmassy!


No comments:
Post a Comment